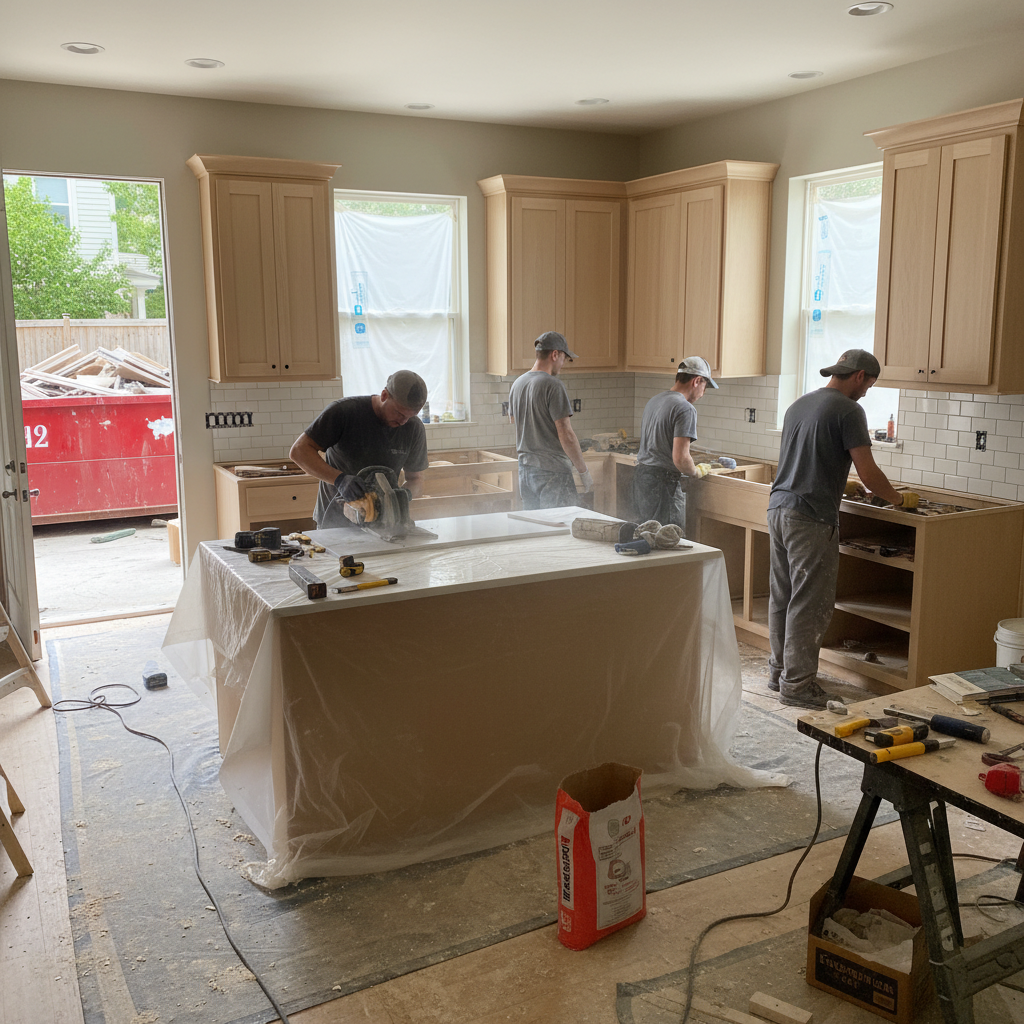
The trouble usually shows up the day the new cabinets arrive. The boxes look beautiful in the driveway, then we carry them into a kitchen in New City or a bathroom in Middletown and suddenly the room tells the truth. One wall bows out, the floor drops half an inch near the stove, and that nice clean cabinet plan from the showroom doesn't quite match the house in front of you. I've walked into plenty of jobs where the homeowner said, "It looked simple online," and by lunchtime they were staring at a crooked pantry cabinet and a pile of shims.
Around Rockland County and Orange County, older homes love to keep you honest. I'd say seven out of ten pre-1970s kitchens I work in have at least one wall that's out of plumb enough to affect cabinet installation, and uneven floors are even more common. That's not bad construction so much as age, settling, and our Hudson Valley freeze-thaw cycles doing what they do year after year. Summer humidity swells wood a bit, spring moisture finds weak spots, and nothing in an older house is ever as square as the tape measure says it should be.
That's why good cabinet installation isn't just hanging boxes and calling it a day. It's layout, shimming, scribing, fastening into solid framing, and planning around plumbing, tile, appliances, and countertop overhangs before the first screw goes in. Whether you're setting a full kitchen or swapping in a bathroom vanity and linen tower, the difference between a clean job and a headache usually comes down to prep. I'll walk you through how I do it in the field, the mistakes I see homeowners make, and what makes cabinet installation Hudson Valley NY homes a little different from brand-new construction somewhere else.
Planning, Measuring, and Wall Prep
Start by finding the high point of the floor
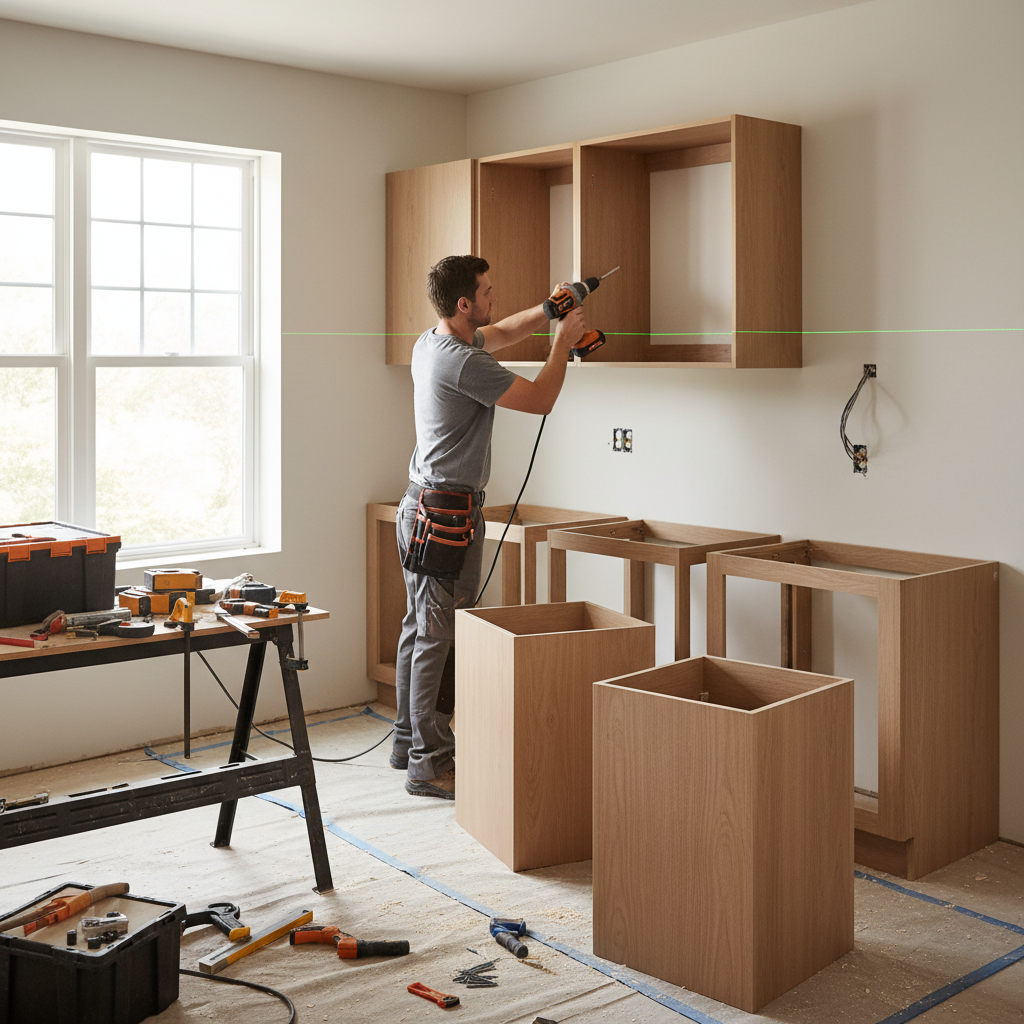
Before I open a box, I map the room. I run a laser level across the cabinet wall, then check the floor with a 6-foot level and a tape. In kitchens, the high point of the floor is what everything else works off of, because your base cabinets all need to finish at the same height for the countertop fabricator. Standard base cabinets are usually 34 1/2 inches tall, and with a typical 1 1/2-inch countertop you land at a finished height of 36 inches. If one side of the room drops 5/8 inch over 9 feet, I already know I'm shimming that run and possibly scribing a finished toe-kick later.
Measure the room, not just the old cabinets
A lot of homeowners measure cabinet-to-cabinet and miss the details that actually matter. I measure wall length, ceiling height, window trim depth, appliance openings, plumbing locations, and the distance from corners to outlets and switches. For kitchens, I want exact rough-opening widths for the range, refrigerator, and dishwasher. A dishwasher opening should finish at 24 inches wide, and the height under the countertop usually needs to stay friendly to a standard unit, especially if new flooring is going in. For bathrooms, I check supply lines, drain height, and whether the vanity top will clear baseboard, door casing, or a radiator.
Find studs and verify what's really behind the wall
Studs are supposed to be 16 inches on center, but in older homes in Nyack and Suffern I've seen everything from 14 inches to 24 inches, plus old blocking, plaster repairs, and abandoned pipes where you don't expect them. I use a Franklin Sensors stud finder, then confirm with a small finish nail or pilot hole in a spot the cabinet will cover. Wall cabinets need real support. Drywall anchors are not a substitute. On a typical upper cabinet, I'm looking for solid fastening with cabinet screws into studs, and on wider units I'll often want at least two stud connections.
Flatten and strengthen the installation surface
Cabinets only go in as straight as the wall behind them allows. If the drywall is loose, crumbling, or bowed more than about 1/4 inch across a cabinet back, I fix that first. Sometimes that means patching drywall; sometimes it means adding a 3/4-inch plywood backer behind a pantry or vanity wall where plumbing cutouts have weakened things. In kitchens with badly wavy plaster, I may use filler strips and scribe panels so the face frames stay straight even when the wall doesn't.
Dry-fit the layout before permanent fastening
Once the room is prepped, I lay out the cabinet order on the floor and label each box. Corner cabinets, fillers, appliance panels, and blind-base hardware need to make sense before installation starts. This is also when I check door swing clearance. A cabinet next to a wall often needs a 1 1/2-inch to 3-inch filler so the door and drawer fronts open fully without banging the trim.
Mark a level line for the top of all base cabinets and a second line for the bottom of the wall cabinets before you start. In most kitchens, the bottom of the uppers lands around 54 inches above the finished floor, giving you an 18-inch backsplash space.
Homeowners often measure before final flooring thickness is known. A new tile floor can raise the room enough to create a dishwasher or refrigerator clearance problem.
Installing Kitchen Wall and Base Cabinets
Hang the wall cabinets first
I always install the uppers before the bases in a kitchen. It gives you clear ladder access and keeps you from leaning over new base cabinets and damaging them. I snap a level line for the bottom of the wall cabinets, then screw a straight ledger board to the wall just below that line. A simple 1x4 ledger saves a lot of grief because it carries the weight while you position the boxes. I usually start with the corner cabinet or the cabinet at the most visible end of the run, depending on the layout.
Clamp, align, and fasten cabinet by cabinet
Each wall cabinet gets clamped to its neighbor at the face frame or stile, checked for flush alignment, and predrilled before I run the screws. I like GRK 2 1/2-inch cabinet screws or equivalent washer-head cabinet screws because they pull tight without blowing out the cabinet interior. If the wall is out of plumb, I shim behind the cabinet only at stud locations so the box stays square. Then I trim the shim tails with a utility knife or oscillating tool. What you don't want is a cabinet twisted to match a crooked wall; that leads to doors that never line up right.
Set the base cabinets from the high point out
Once the uppers are secure, I move to the base run. The first base cabinet gets set at the high point of the floor, leveled side-to-side and front-to-back, then anchored. From there, every other cabinet is brought to that same finished height with composite shims or cedar shims placed under the sides and at support points. I clamp neighboring cabinets, screw them together through the face frames, and keep checking with a long straightedge across the tops. Over a 10-foot run, I want that line dead straight for the countertop guys. Even an 1/8-inch dip can show up later in stone.
Watch your appliance openings and clearances
This is where a lot of DIY jobs go sideways. A 30-inch range opening needs to finish at 30 inches, not 29 7/8 because you got a little aggressive with the shims. A standard dishwasher opening is typically 24 inches wide and should stay plumb so the unit slides in without rubbing. Refrigerator panels need proper depth and clearance for door swing, especially with French-door models. I also account for crown molding, light rails, and whether a microwave cabinet needs a dedicated outlet centered in the right spot.
Finish with fillers, end panels, and trim that look intentional
The best cabinet jobs don't just stand straight; they look built for the room. That usually means scribing fillers to uneven walls, installing finished end panels where cabinet sides are exposed, and leaving even reveals around windows and appliances. For face-frame cabinets, I keep reveals consistent and check that adjacent doors line up before I call the run complete. Little finish steps like FastCap color-matched screw covers, clean bead lines at scribed panels, and properly fitted crown molding make the difference between a basic install and a professional one.
Use a temporary ledger board for wall cabinets and remove it after the run is fully fastened. It keeps the bottom edges perfectly aligned and frees up your hands for clamping and shimming.
One of the biggest mistakes is forcing cabinets tight to a crooked wall without shims. The boxes twist, the face frames separate, and the doors never adjust quite right.
Bathroom Vanity and Linen Cabinet Installation
Bathrooms are tighter, so layout matters even more
Bathroom cabinet installation looks simpler than a kitchen, but the tolerances are tighter. In a small bath, a vanity that's 1/2 inch too far left can throw off the sink drain, crowd the toilet, or leave the door trim looking jammed. Standard vanity heights are often 31 inches, 34 1/2 inches, or comfort height at 36 inches with the top. Before I set anything, I verify the centerline of the drain, the location of shutoff valves, and whether the flooring is already in place.
Level the vanity and protect the top
Just like a kitchen base cabinet, the vanity has to sit level and flat. I shim under the cabinet box, not randomly under the center where it can flex. If the vanity top is cultured marble or quartz, I dry-fit first and check overhang on both sides before applying silicone. On floating vanities, I don't trust drywall alone. I want solid blocking in the wall or a structural ledger fastened into studs so the cabinet carries weight properly over time.
Cut plumbing openings carefully and seal raw edges
When I cut the back of a vanity for supply lines and drains, I make clean openings with a hole saw or oscillating tool and keep them slightly oversized for adjustment. Then I seal exposed particleboard or MDF edges with shellac-based primer or clear polyurethane. That's a small step, but in bathrooms it matters. Spring moisture, steam from showers, and the occasional leak under the trap can wreck unsealed cabinet material fast.
Linen towers and medicine cabinets need the same attention as kitchen uppers
Tall linen cabinets should be leveled, shimmed at stud points, and anchored top and bottom so they don't rack. In older bathrooms with plaster walls, I'll often scribe a side panel instead of trying to pull the whole cabinet into a crooked wall. For recessed medicine cabinets, I verify the stud bay, plumbing, and vent locations before cutting. A clean vanity install isn't just about looks; it's about making sure drawers clear the door, the plumbing stays serviceable, and moisture doesn't shorten the life of the cabinet.
Before setting a bathroom vanity, shut off the water and replace old corroded shutoff valves if needed. It's a lot cheaper to do it while the wall and plumbing are accessible.
A common DIY mistake is cutting plumbing holes too low or too tight. That leaves no room for adjustment and can force the cabinet to sit off the wall.
Common Mistakes to Avoid
The first mistake I see is skipping layout and assuming the room is square. Homeowners will center a sink base on a window without checking the corners, then realize the pantry cabinet pinches the trim on the far wall. In kitchens and baths, cabinet installation is a chain reaction. One bad starting point throws off fillers, countertop overhangs, appliance gaps, and trim reveals all the way down the line.
Another big one is forgetting clearance for doors, drawers, and moldings. A cabinet may technically fit in a 12-inch gap, but if the drawer front hits the casing or the knob smacks the wall, it wasn't installed correctly. Cabinets next to walls, refrigerators, and ranges often need fillers or finished panels. I plan those from the beginning instead of trying to hide the problem after the fact.
Fastening mistakes are common too. I've seen uppers hung with generic drywall screws, cabinets screwed through thin backs without washers, and tall pantry units left with only a couple of anchors. For most installs, I want purpose-made cabinet screws into studs, shims at fastening points, and enough fasteners to support the load without distorting the box. Over-tightening is just as bad as under-fastening because it can pull a cabinet out of square.
The last major mistake is rushing the finish stage. Doors and drawers need adjustment after the boxes are set. European hinges usually give you side, depth, and height adjustment, and taking 20 extra minutes there makes the whole run look better. I also tell homeowners not to load cabinets immediately if silicone, adhesive panels, or fresh touch-up materials still need time to cure. A clean install isn't finished when the last screw goes in; it's finished when everything opens smoothly, lines up evenly, and looks intentional.
Let the cabinets sit inside the house for at least 48 hours before installation, especially in winter. That gives the materials time to acclimate to indoor temperature and humidity.
Pay for a professional layout review even if you're planning to install cabinets yourself. Catching one filler, appliance, or plumbing mistake on paper can save hundreds in reorders.
Cost Breakdown: What to Expect
Cabinet installation costs vary a lot depending on whether you're working with stock cabinets, semi-custom boxes, full-height pantry units, or a small bathroom vanity. On the DIY side, homeowners often underestimate the setup cost. A decent laser level can run $60 to $200, clamps another $40 to $150, cabinet jacks or support poles $100 to $250, and you'll still need cabinet screws, shims, filler material, caulk, touch-up kits, and maybe an oscillating tool blade pack. For a basic kitchen install, it's common to spend $300 to $900 in tools and supplies before you even count the cabinets.
For professional labor in Rockland County and Orange County, a handyman or cabinet installer typically lands around $85 to $110 per hour in much of Orange County and about $95 to $135 per hour in much of Rockland County, depending on complexity, travel, trim work, and whether plumbing or drywall corrections are involved. A straightforward small kitchen with 8 to 10 stock cabinets might cost roughly $2,500 to $4,500 in labor for installation only. A larger kitchen with 12 to 18 cabinets, pantry units, fillers, crown, finished end panels, and appliance fitting often runs $4,500 to $9,000 in labor. Bathroom vanity installation usually falls around $450 to $1,200 for a single vanity and top set, while a double vanity or added linen tower can bring that to $900 to $1,800 or more.
Then there are the extras homeowners forget to budget for. Demo and disposal of old cabinets can add $300 to $900. Drywall repair behind removed cabinets might be $250 to $1,200. Plumbing changes for a sink move can run $500 to $2,500, and electrical relocation for under-cabinet lighting, outlets, or a microwave circuit can add another $250 to $1,500. If you're doing stone countertops, templating usually happens after cabinet installation, so any cabinet issue can delay the whole schedule.
The cheapest install isn't always the least expensive project in the end. I've been called in more than once to fix a DIY cabinet run where the homeowner saved on labor but ended up reordering filler panels, replacing damaged cabinet sides, and paying twice for countertop templating. If your room is square, your cabinets are light stock boxes, and you're comfortable with layout and leveling, DIY can make sense. But in older Hudson Valley homes where walls and floors fight you, professional installation often pays for itself by avoiding rework.
Keep the sink, dishwasher, and range in their existing locations when possible. Avoiding plumbing and electrical moves is one of the fastest ways to control total project cost.
Check sink base cabinets twice a year for slow leaks at the trap and shutoff valves. Catching moisture early can save the cabinet floor and prevent moldy particleboard damage.
📍 How This Applies to Homes in Rockland & Orange County
Cabinet installation in Rockland County and Orange County comes with a few realities you don't always see in showroom plans. In towns like Nanuet, Spring Valley, Suffern, Nyack, and New City, a lot of homes have settled enough that a laser level tells a different story than the eye does. Floors dip, plaster walls wave, and older framing can be inconsistent. In pre-1970s homes especially, I assume I may need more shimming, scribing, and wall repair than the homeowner expects.
The Hudson Valley climate plays a part too. Harsh winters, freeze-thaw cycles, spring moisture, and summer humidity all work on a house year after year. That movement shows up around windows, exterior walls, and flooring transitions, which matters when you're trying to keep a 10-foot cabinet run straight. I've seen kitchens in Newburgh and Middletown where the cabinet wall looked fine until the laser showed a 3/4-inch drop from one end to the other. That's not unusual around here, and it's why leveling and proper fastening matter so much.
Bathrooms have their own local headaches. In older homes, I often find vanity areas with patched plaster, old tile buildup, or plumbing that was moved once already and never centered correctly. Add spring moisture and summer humidity, and any raw MDF edge under a sink is asking for trouble. In the Hudson Valley, I always recommend sealing cut cabinet edges in bathrooms and making sure exhaust fans actually vent moisture out, not just around the room.
What works best in our area is a cabinet installation plan that respects the house you actually have, not the perfectly square room shown on the box. That means leaving space for scribed fillers, checking walls for hidden surprises, and not rushing the prep because winter damage or long-term settling will expose shortcuts sooner or later. Around here, the best-looking cabinet jobs are the ones built with local conditions in mind.
Frequently Asked Questions
Ready to Get Started?
Get Your Free Estimate Today
Serving Rockland County & Orange County, NY. Professional results, guaranteed.
Request a Free Estimate →