Hardwood Floor Repair Hudson Valley Homeowners Can Trust: When to DIY and When to Call a Pro
From minor scratches to deep board damage, here’s how to tell what you can handle yourself and what’s worth bringing in a seasoned flooring pro for.
Saturday morning light hits the living room floor, and suddenly every flaw jumps out at you. The dog’s nail marks by the sofa, the gray wear path from the hallway to the kitchen, the cupped boards near the back door after a wet spring, and that one black stain by the radiator that keeps catching your eye. I’ve walked into homes all over Rockland and Orange County where the owners thought they needed brand-new flooring, when in reality the floor just needed the right repair and a proper refinish.
Around the Hudson Valley, hardwood takes a beating that folks in milder climates don’t always deal with. We get furnace-dry winters, sticky summers, spring moisture, and plenty of tracked-in salt, grit, and slush. In older homes especially, I see the same pattern over and over: seasonal gaps in January, swelling in July, and surface finish wearing down fastest in entryways and kitchen paths. The National Wood Flooring Association notes that many solid hardwood floors can be sanded and refinished multiple times over their life, but only when damage is caught before it gets into the tongue, groove, or subfloor.
That’s the part homeowners really need help with: knowing the difference between cosmetic wear, repairable damage, and a floor that needs a pro’s touch before it gets worse. A little screening and recoating is one thing. Replacing water-stained oak boards woven into a 1950s floor in New City or leveling a sagging patch in a Middletown colonial is another story. I’ll walk you through where DIY makes sense, where it usually goes sideways, and how to make the right call for your hardwood floor repair Hudson Valley project.
How to Tell Whether Your Floor Needs Repair or Refinishing
A lot of the job is diagnosis. Homeowners usually look at a worn floor and see one big problem, but I break it down into layers. First is the finish itself: light scratches, dull traffic lanes, and haze from old cleaner buildup. Second is the wood: dents, gouges, pet stains, cupping, crowning, loose boards, or split tongues. Third is what’s under the wood: subfloor moisture, movement, squeaks, or old patchwork repairs. The right fix depends on which layer is actually failing.
Surface wear that usually doesn’t need full sanding
When the finish is worn but the wood fibers are still intact, a screen-and-recoat is often enough. That’s common on 2 1/4-inch red oak strip flooring in living rooms and bedrooms. I check high-traffic areas first by putting a few drops of water on the floor. If the water beads, the finish is still doing its job. If it darkens the wood within a minute or two, the protective layer is likely gone. For shallow scratches that don’t catch a fingernail, products like Bona Traffic HD, Bona Mega ONE, or DuraSeal water-based finishes can bring a floor back without cutting deep into the boards.
Signs you need repair before refinishing
When I see black staining, board edges curling up, soft spots, or movement underfoot, refinishing alone won’t solve it. A black ring near a plant stand or radiator often means water got into the wood, and once tannin staining sets into oak, sanding may not fully remove it. Cupping greater than about 1/16 inch across the face of a board usually points to moisture imbalance, and you need to solve that first or the floor will fail again after finishing. Loose boards can sometimes be face-nailed with 15-gauge finish nails and plugged, but damaged tongues or broken end joints usually call for selective board replacement.
When full sanding is the right move
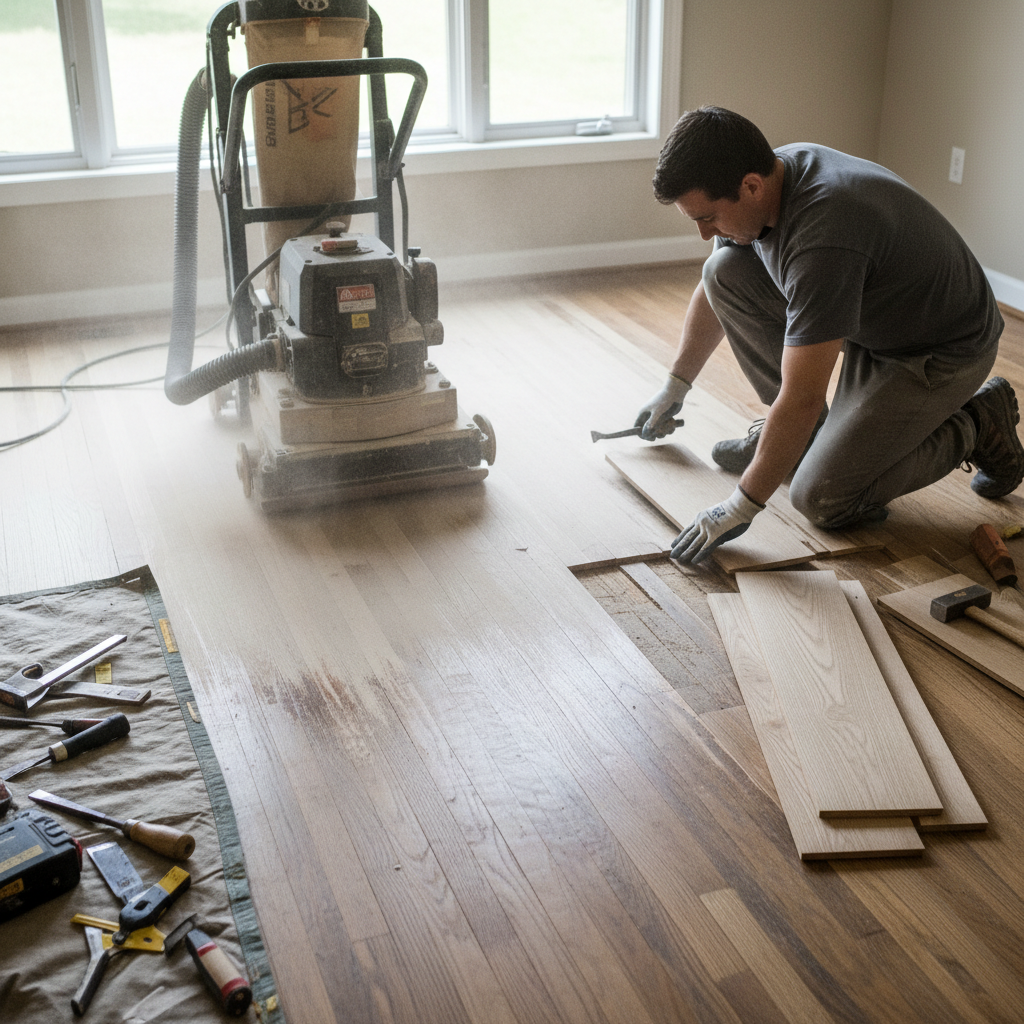
A full sand and refinish makes sense when the floor has deep wear patterns, uneven old stain, multiple layers of wax or acrylic polish, or repairs that need color blending. On a typical solid hardwood floor, I use a drum sander or belt sander starting around 36 or 40 grit for heavy finish removal, then step through 60 and 80 grit, sometimes finishing at 100 grit depending on the species and final sheen. Edges get cut with an edger, and corners get detailed by hand. On older floors, especially prefinished boards or patchy old oak, skipping grits is where swirl marks and chatter show up fast.
When the floor may be too thin to refinish again
Not every floor has unlimited life left in it. Solid hardwood usually starts at 3/4 inch thick, but after a few refinishes, the wear layer above the tongue gets too thin. If I can see the tongue at board edges, or if previous aggressive sanding has left low spots around old nail heads, I get cautious. Engineered hardwood is even trickier; some products only have a 1 to 2 mm veneer and shouldn’t be sanded at all, while others with a 4 to 6 mm wear layer may allow one careful refinishing. That’s why a quick site check beats guessing every time.
Run a moisture meter before you sand. For hardwood, I like to see flooring moisture content within about 2% to 4% of the subfloor, depending on the material, before I touch it with a sander.
Homeowners often try to hide deep pet stains with stain color alone. If the stain has penetrated the wood fibers, darker stain usually makes the damaged area look worse, not better.
When DIY Makes Sense and When to Call a Pro
I’m all for homeowners tackling the right kind of floor work. I’ve had clients in Suffern and Newburgh save good money by handling simple touch-ups themselves, especially in small bedrooms or closets. The key is being honest about the size of the repair, your tools, and how picky you are about the final look. Hardwood is one of those finishes where small mistakes don’t stay small for long.
Good DIY projects for handy homeowners
DIY makes sense for isolated surface scratches, small finish touch-ups, replacing a floor vent trim piece, or repairing one or two minor dents. A stain marker or wax repair kit from Minwax or Varathane can work on shallow blemishes. For small gouges, colored wood filler like Bona Pacific Filler or Timbermate can blend well if you test color first. You can also buff out heel scuffs with a microfiber pad and manufacturer-approved cleaner, and in some cases apply a refresher product made for your existing finish system. Area rugs, felt pads, and better furniture glides are still some of the cheapest fixes in the business.
DIY jobs that get risky fast
Once you get into sanding more than a small isolated area, color matching old wood, weaving in replacement boards, or dealing with moisture damage, the difficulty jumps. Sanding even a 3-by-3-foot patch can leave a dish-shaped low spot if you linger too long with a random orbital sander. Replacing a board in the middle of a floor means cutting the board out cleanly with a circular saw set just shy of the floor thickness, removing the bottom groove on the replacement piece, dry-fitting, gluing with urethane adhesive, and blending the repair into surrounding finish. That sounds straightforward until you’re trying to match a 25-year-old ambered polyurethane finish on red oak.
Jobs where I’d call a pro without hesitation
Call a pro for widespread cupping, crowning, flood damage, pet urine stains that penetrated the subfloor, squeaks caused by subfloor movement, or any repair that runs under cabinets, radiators, or baseboard heat. Same goes for parquet, engineered hardwood with unknown veneer thickness, and historic floors in older Hudson Valley homes where salvaging the original material matters. When I’m matching old oak, maple, or fir, I’m not just replacing wood. I’m looking at grain direction, board width, stain absorption, sheen level, and how sunlight has aged the surrounding floor.
What a pro brings that a rental machine doesn’t
A homeowner rental setup can remove finish, sure, but a seasoned refinisher is controlling flatness, grit sequence, edge feathering, dust containment, and final color consistency. We use professional dust collection, moisture testing, floor prep tools, trowel filler where appropriate, and commercial-grade finishes that cure harder than a lot of big-box store options. We also know when not to sand. I’ve seen floors in Nyack and Spring Valley that looked rough but only needed repair plus a recoat, and I’ve seen others where a hidden moisture issue would’ve ruined a fresh finish in six months.
Before any touch-up, clean with the finish manufacturer’s approved cleaner only. General-purpose cleaners, vinegar mixes, and oil soaps can cause adhesion failure when you try to recoat later.
One of the biggest DIY mistakes is sanding a single damaged board area too aggressively and creating a low spot that telegraphs through the finish forever.
Common Mistakes to Avoid
The most common mistake I see is homeowners treating every hardwood problem like it’s just a finish problem. They grab stain, polyurethane, or a rental sander before they’ve figured out why the floor changed in the first place. If the boards are cupping because of a damp basement, a small leak, or spring moisture coming through the subfloor, refinishing is just cosmetic. The floor will keep moving until the moisture issue is fixed.
Another big one is mixing products that don’t belong together. Wax over polyurethane, acrylic polish over aluminum oxide finishes, oil soap residue under a water-based topcoat, or filler that won’t take stain evenly can all create a patchy mess. I’ve had to strip floors where the original damage was minor, but the homeowner made it worse by stacking on the wrong products. Once adhesion fails, you’re usually not doing a simple touch-up anymore.
Sanding mistakes are expensive because they remove material you can’t put back. Using the wrong grit sequence, tipping the machine at startup, failing to feather the edger into the field, or sanding across the grain leaves waves, chatter, and halos around the room perimeter. On oak floors, those marks may not show clearly until stain hits them, and then every flaw lights up. The same goes for overfilling joints during dry winter months. Come summer, those seasonal gaps close, and the hardened filler can push out or crack.
Homeowners also underestimate cure times. A floor may feel dry in socks after several hours, but that doesn’t mean it’s ready for rugs, pets, furniture, or heavy traffic. Water-based finishes often need at least 24 hours before light use and several days before furniture goes back carefully; full cure can take a week or more depending on product and humidity. Oil-based polyurethane takes even longer. Rush that part, and you’ll trap dents, scuffs, or rug backing marks into a brand-new finish.
Have the floor and subfloor moisture checked before repair or refinishing, especially near exterior doors, dishwashers, radiators, and basement stairs. That one step prevents a lot of failed jobs.
Fix isolated board damage early. Replacing two stained boards now is far cheaper than waiting until moisture spreads and you need a larger tear-out plus subfloor repair.
Cost Breakdown: What to Expect
Costs vary a lot depending on whether you’re doing a touch-up, selective repair, full refinishing, or partial replacement. In Rockland and Orange County, labor isn’t bargain-basement cheap, especially for skilled finish work, but paying for experience usually saves money compared to correcting a bad sanding or a failed coating system. Travel, setup, furniture moving, dust containment, stain samples, and finish type all affect the final number.
For DIY, basic scratch repair kits run about $15 to $40. Wood filler, touch-up markers, microfiber pads, and approved cleaner may put you in the $50 to $150 range for minor cosmetic fixes. Renting a drum sander, edger, and shop vacuum for a weekend can run roughly $175 to $300, and you’ll still need sandpaper, plastic, tape, filler, stain if used, and finish. All-in, a real DIY refinishing project often lands around $350 to $900 for a small to mid-size room, and that’s assuming you already own some tools and don’t make a mistake that requires rework.
Professional hardwood floor repair in the Hudson Valley usually breaks down by scope. Small board repairs may run about $250 to $600 for a simple isolated fix, while woven-in board replacement with color blending can range from $600 to $1,500 or more depending on species, access, and finish matching. Full sand and refinish pricing commonly falls around $4.50 to $8.50 per square foot for standard solid hardwood in our area, with stained floors, heavy repairs, stairs, or premium water-based finishes pushing that higher. In Rockland County towns like New City, Nyack, and Nanuet, I typically see skilled finish labor in the ballpark of $85 to $125 per hour for small repair work. In Orange County, including Middletown and Newburgh, rates are often a touch lower but still commonly around $75 to $115 per hour depending on complexity.
A full project for a 250-square-foot living and dining area might cost $1,125 to $2,125 for sanding and finishing alone, before major repairs. Add selective board replacement, stain work, moving furniture, and trim removal or reset, and the number can climb into the $2,000 to $3,200 range. Screen-and-recoat service, when the floor qualifies for it, is usually more affordable than full sanding and often runs around $1.50 to $3.50 per square foot. That can be one of the best values out there because it extends the life of the floor without removing much material.
The cheapest price is rarely the best deal on hardwood. Ask what finish system is included, how many coats, whether buffing between coats is part of the process, how dust is controlled, and whether repairs are truly blended or just patched. I’d rather see a homeowner spend a little more once than pay twice after a rushed job peels, scratches too easily, or leaves visible repair lines down the middle of the room.
Bundle board repairs and refinishing together when possible. It’s usually more cost-effective to replace damaged boards before a scheduled full refinish than to do a separate repair visit later.
Keep indoor humidity around 35% to 55% year-round with a humidifier in winter and dehumidification or AC in summer. Stable humidity prevents gaps, cupping, and finish stress that lead to repair bills.
📍 How This Applies to Homes in Rockland & Orange County
Hardwood floors in Rockland County and Orange County move more than many homeowners expect, and our Hudson Valley climate is a big reason why. In winter, the heat runs constantly and indoor air gets bone dry, so boards shrink and gaps open up. Then spring moisture rolls in, basements get damp, and freeze-thaw cycles around foundations can introduce enough moisture to make edges cup or finishes turn cloudy near exterior walls and entry doors. By summer, humidity climbs and every floor wants to swell back up.
That’s especially true in older pre-1970s homes throughout places like Nanuet, Spring Valley, Suffern, Nyack, and New City. A lot of those houses have original oak strip flooring over older subfloors, sometimes with crawlspace or basement moisture issues that were never fully addressed. I’ve also seen plenty of historic patchwork where one room was repaired decades ago with a slightly different species or board width. On those floors, repair and refinishing take a careful hand because the goal isn’t just making it look new. It’s making it look like it belongs.
Over in Orange County, Middletown and Newburgh homes often deal with a similar mix of age and seasonal movement, but I also run into more wide-open layouts where sunlight and traffic create uneven wear patterns from one end of the first floor to the other. Mudroom entries, kitchen walkways, and patio-door zones take a real beating from wet boots, road salt, and summer foot traffic. That’s where selective board repair, screening and recoating, and better moisture control can buy you years before a full refinish is needed.
Locally, the smartest hardwood floor plan is preventive. Use mats at entrances, keep gutters and grading under control, run a humidifier during harsh winters, and don’t ignore that first sign of staining or cupping after a wet spring. Around the Hudson Valley, a floor rarely fails all at once. Usually it gives you a warning season by season, and catching it early makes all the difference.
Frequently Asked Questions
Ready to Get Started?
Get Your Free Estimate Today
Serving Rockland County & Orange County, NY. Professional results, guaranteed.
Request a Free Estimate →