Tile Installation Rockland County NY: How to Install Bathroom, Kitchen, and Floor Tile the Right Way
A local contractor's practical guide to planning, setting, and finishing tile so it lasts through busy kitchens, wet bathrooms, and Hudson Valley seasons.
The hairline crack usually shows up first. Then the grout starts crumbling near the tub, one tile sounds hollow when you tap it, and before long you're staring at a bathroom or kitchen floor that looked great for six months and aged ten years in one winter. I've walked into plenty of homes in Nanuet, New City, and Middletown where the tile wasn't the real problem at all. The problem was underneath it: a spongy subfloor, skipped waterproofing, or a rushed layout that left slivers along every wall.
Around Rockland County and Orange County, I see the same pattern over and over. In older homes, especially pre-1970s houses, floor framing moves more than people think, and moisture has a way of finding every shortcut a past installer took. I'd say seven out of ten tile repairs I get called for could've been avoided with better prep, not fancier tile. That's the part homeowners don't always hear when they're standing in the showroom looking at colors and patterns.
Good tile work isn't just about setting square pieces in straight lines. It's about flattening the surface, choosing the right underlayment, using the right thinset, getting proper coverage, and leaving room for movement so the floor can handle our Hudson Valley humidity swings and winter dryness. Whether you're tackling a backsplash, a bathroom floor, or a full shower, here's how I approach tile installation Rockland County NY homes can actually live with for the long haul.
Choosing the Right Tile and Prep
Start with the surface, not the tile
Most failed tile jobs start before the first tile ever hits thinset. The subfloor or wall surface has to be solid, flat, and appropriate for tile. For floors, I like no more than 1/4 inch variation over 10 feet for standard tile, and for large-format tile, I shoot for 1/8 inch over 10 feet. In a lot of Rockland and Orange County homes, especially older ones, that means checking joists for bounce, screwing down loose subfloor panels, and using a cementitious patch or self-leveling underlayment before anything else happens.
Pick the right tile for the room
Bathrooms, kitchens, and floors all have different demands. For bathroom floors, porcelain is usually my first recommendation because it's dense, less absorbent, and holds up well to moisture. For shower walls, ceramic or porcelain both work, but I pay attention to size and weight because bigger wall tiles need proper mortar and support. In kitchens, a backsplash can use lighter ceramic or glass tile, while a kitchen floor does better with a PEI-rated porcelain tile and a slip-resistant finish if you've got kids or dogs running through the house.
Match the underlayment and mortar to the job
On wood subfloors, I often install Schluter Ditra or a cement backer board like HardieBacker 1/4 inch for floors, depending on the assembly and height needs. In wet areas, I don't rely on tile and grout to stop water. The waterproofing has to be behind or directly under the tile, using systems like Schluter Kerdi, a proper shower pan, or a liquid membrane like RedGard where it's approved and applied to the right thickness. For mortar, I use polymer-modified thinset like MAPEI Ultraflex LFT or LATICRETE 253 Gold for many floor and wall applications, and I size the trowel to the tile, often 1/4 x 3/8 inch square-notch for mid-size floor tile and 1/2 inch notch for larger formats.
Dry layout saves headaches later
Before I mix mortar, I snap control lines and dry-lay enough tile to see where cuts will land at walls, tubs, vanities, and doorways. You want to avoid tiny sliver cuts, especially in visible areas. A centered layout isn't always the best layout; a balanced layout is. In a narrow bathroom, for example, I'd rather shift the field so both sides finish with 3 inch cuts than leave one side full and the other with a 1/2 inch strip that chips every time the floor moves.
Check tile from several boxes before installation. Shade variation and size differences happen more than homeowners expect, especially with imported porcelain and natural-look tile.
Homeowners often assume cement board adds structural strength. It doesn't. It provides a tile-friendly surface, but the floor still needs proper stiffness underneath.
Bathroom Tile Installation Step by Step
Waterproofing is the whole ballgame
Bathroom tile has to deal with standing water, steam, soap, and daily temperature swings. On shower walls and tub surrounds, I make waterproofing the priority. That means installing cement board or an approved foam board correctly, taping seams with alkali-resistant mesh, and applying a full waterproofing system with sealed corners, niches, and penetrations. In showers, I aim for at least 95 percent mortar coverage on the back of each tile because voids behind tile in wet areas become weak spots and water traps.
Layout around fixtures matters more than people think
I usually start by finding the most visible wall and setting a level ledger board so the first course is dead straight. Tubs and shower pans are rarely perfectly level, so setting right off them can throw the whole wall out. I leave a movement joint at changes of plane, like wall-to-wall and wall-to-floor transitions, and fill those with color-matched silicone instead of hard grout. Around valves and shower heads, I use a diamond hole saw and keep cuts clean enough that trim plates fully cover them without looking sloppy.
Bathroom floors need solid prep and smart spacing
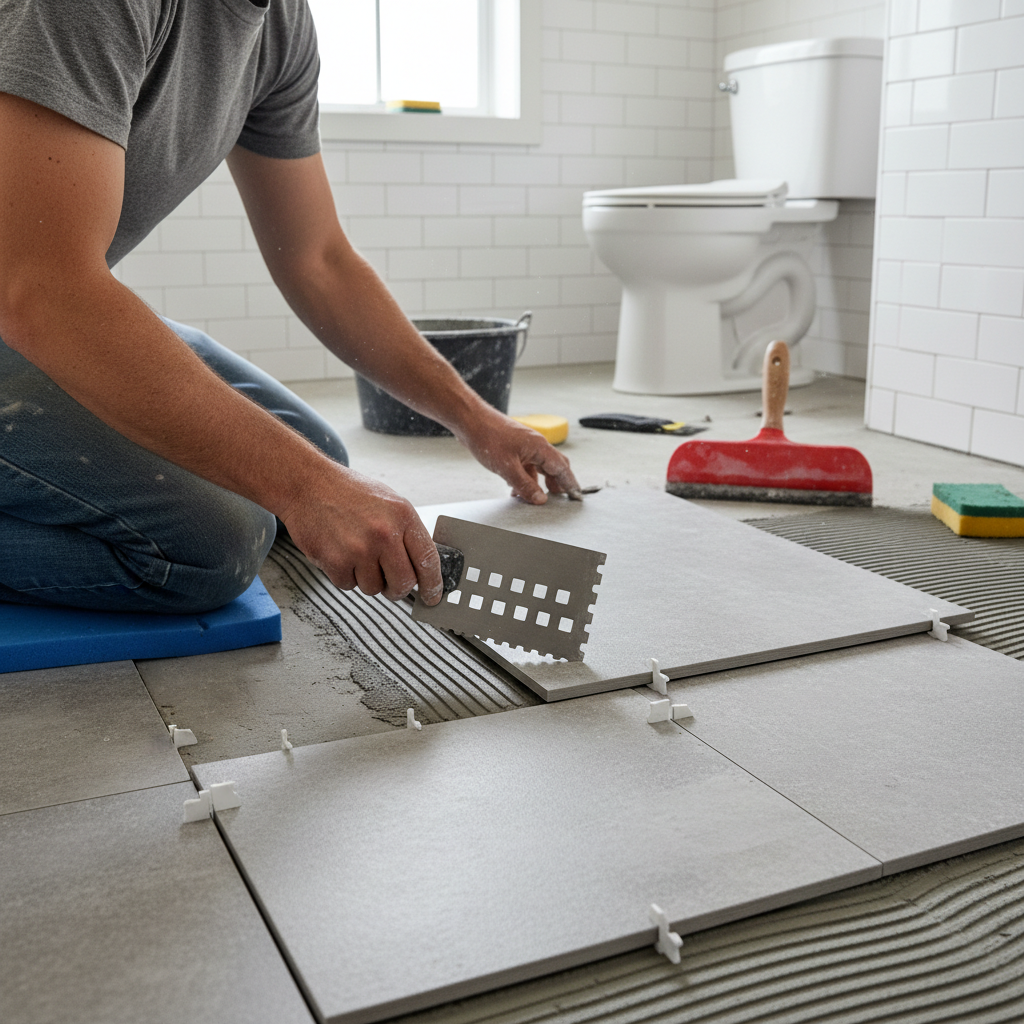
On bathroom floors, I check for deflection first and then install underlayment based on the subfloor assembly. A common setup might be 3/4 inch plywood, an uncoupling membrane, and 12 x 24 porcelain with a 1/3 offset to reduce lippage. For grout joints, 1/8 inch is common with rectified tile, but I still verify actual tile size because no tile is perfectly identical box to box. With larger tile, I back-butter each piece and use a leveling clip system to keep edges tight and the surface smooth.
Grout and cure time make the finish last
Once the tile is set, I give the mortar proper cure time, usually 24 hours minimum, longer in cool or damp conditions. For grout, cement grout works fine in many spots, but in bathrooms I often recommend a high-performance option like MAPEI Ultracolor Plus FA or an epoxy grout in heavy-use showers where stain resistance matters. Then I caulk all movement joints, reinstall trim carefully, and remind homeowners not to rush the room back into service. The cleanest tile job in the world won't last if somebody showers in it before the system has cured.
Use a laser level when setting shower wall tile. It keeps niches, accent bands, and plumbing cuts lined up, especially in older bathrooms where nothing is truly square.
Grouting inside corners is a classic mistake. Those joints need flexible sealant, not hard grout, or they'll crack as the walls move.
Kitchen Tile Installation and Backsplashes
Kitchens need durable tile and a realistic layout
Kitchen tile takes a beating from chair legs, dropped pans, muddy shoes, and constant cleaning. For floors, I steer most homeowners toward porcelain in the 3/8 inch range with a matte or textured finish that won't turn slick when somebody spills water by the sink. For backsplashes, the tile can be more decorative, but the layout still matters. I always plan around outlets, cabinet lines, and the space between countertop and uppers so the pattern looks intentional instead of chopped up.
Backsplash prep is simpler, but details count
A backsplash usually goes over clean, painted drywall in good condition, but glossy paint should be scuffed and greasy surfaces need to be fully cleaned first. I like using a quality modified thinset for ceramic and porcelain, while some glass tiles require the mortar specifically recommended by the manufacturer. A 3/16 x 5/32 inch V-notch or small square-notch trowel is common for backsplash work, and I flatten the ridges when needed so they don't show through translucent tile. Spacers help, but I still eyeball every row because cabinets and counters aren't always parallel.
Floor tile in kitchens has to work with appliances and transitions
In kitchens, height matters. Before setting floor tile, I check dishwasher clearance, refrigerator swing, and the transition into adjoining hardwood or vinyl. I've had more than one homeowner in Suffern or Newburgh call after another installer tiled right up to the dishwasher and trapped it in place. A proper installation plans for finished height, uses reducer strips where needed, and keeps cuts tucked under baseboard or shoe molding for a cleaner finish.
Don't overlook movement and cleanup
Kitchens expand and contract with heat, humidity, and direct sun, especially near sliders and big windows. I leave perimeter gaps, honor movement joints, and use color-matched sealant at dissimilar materials. After grouting, I clean haze thoroughly and protect the floor from early traffic. In a busy family kitchen, the last 5 percent of the job, cleanup, cure time, and sealing where required, makes the difference between a floor that looks sharp in five years and one that always looks tired.
When laying out a backsplash, start by centering on the range or sink focal point, not always the full wall. That's what your eye notices first.
A lot of DIY backsplashes die at the outlets. Forgetting box extenders or misjudging cut locations leaves covers crooked and unsafe.
Floor Tile Layout and Setting
Flat beats level most of the time
Homeowners hear level, but tile really cares about flat. A floor can be slightly out of level and still perform perfectly if it's flat enough for the tile size. I check the room with a long straightedge, mark low spots and humps, and fix those before setting. In older homes in Nyack and Spring Valley, I often find old patchwork repairs, layers of vinyl, and uneven plywood seams that need attention before the first bag of thinset gets opened.
Use the right trowel and coverage technique
For a standard 12 x 24 porcelain floor tile, I commonly use a 1/2 inch square-notch trowel, key thinset into the substrate with the flat side first, then comb all ridges in one direction. I back-butter the tile, set it perpendicular to the ridges, and slide it slightly to collapse them. Every so often, I pull up a tile and check coverage. On interior dry floors, I want strong, continuous support with no big voids at corners or edges, because those are the spots that crack when a loaded pantry cart or appliance rolls over them.
Layout affects the whole room
I establish a control line off the longest visible run and work from there, checking square with the 3-4-5 method or a laser. In long hallways or open kitchens, even a small layout error can snowball and make cuts look worse at every doorway. For plank tile, I usually avoid a 50 percent brick pattern unless the tile is rated for it, because many planks have a slight crown and will show lippage. A 1/3 offset is safer on a lot of manufactured porcelain plank products.
Finishing details protect the edges
At doorways and exposed tile ends, I like using Schluter metal profiles such as Schiene or Reno-T for a clean transition and edge protection. Baseboard, toilet flange height, and undercutting door jambs all matter more than people expect. Once the tile cures, I grout, clean, and protect it from traffic according to product specs. Rushing furniture back in too soon is one of the quickest ways to knock a fresh tile floor out of alignment or stain uncured grout.
Undercut wood door casings with a flush-cut saw and slip the tile underneath. It looks cleaner than trying to trace every casing with tiny visible caulk lines.
Skipping a straightedge check is a big one. Even expensive tile looks cheap on a wavy floor.
Common Mistakes to Avoid
The biggest mistake I see is bad prep hidden under pretty tile. People tile over loose plywood, old sheet vinyl, damaged drywall, or a shower wall with no real waterproofing and hope grout will save them. It won't. Tile is a finish surface, not a structural repair or moisture barrier.
Another common issue is using the wrong mortar, the wrong trowel, or not getting enough coverage. Premixed adhesive has its place on some small dry-area wall tile, but it does not belong in a shower pan or under large porcelain floor tile. I also see homeowners spread too much thinset at once, skin it over, and then wonder why tiles sound hollow a month later.
Layout mistakes are expensive because they're visible forever. Skinny cuts at one wall, crooked lines at the tub, and grout joints that drift around outlets or doorways make the whole room look off, even when the tile itself is nice. That's why I dry-lay the room, check center lines, and account for real-world conditions like bowed walls, out-of-square corners, and cabinet overhangs.
The last one is rushing cure time. Tile might feel solid the next day, but mortar, grout, and sealants need time. Walking on it too soon, putting a toilet back before the floor is ready, or using a new shower before waterproofing layers have cured can undo a lot of good work in a hurry.
Before buying tile, have the floor checked for deflection and flatness. A 20-minute inspection can save you from redoing the whole job.
Spend money on prep and waterproofing before you splurge on premium tile. A mid-range porcelain installed right will outlast a luxury tile installed wrong.
Cost Breakdown: What to Expect
Tile costs vary a lot based on prep, tile size, pattern, and whether we're talking a backsplash, a powder room floor, or a full custom shower. In Rockland County and Orange County, basic professional labor for a straightforward porcelain floor on a sound substrate often falls around 12 dollars to 20 dollars per square foot. More complex installs, like large-format tile, diagonal patterns, heated floors, or floor prep with self-leveler, can push labor into the 18 dollars to 28 dollars per square foot range. Shower walls and pans are typically higher because waterproofing, niches, slope work, and detail cuts take time, commonly 25 dollars to 45 dollars per square foot in labor.
Material costs also have a wide spread. Basic ceramic tile might run 2 dollars to 5 dollars per square foot, while good porcelain is often 4 dollars to 10 dollars, and premium designer or natural stone products can go much higher. Add thinset, grout, membrane, underlayment, spacers, edge trim, sealant, and delivery, and a 100 square foot floor can easily carry 350 dollars to 1,200 dollars in setting materials and accessories before labor. A typical backsplash might land between 900 dollars and 2,500 dollars installed, while a bathroom floor could range from 1,500 dollars to 4,000 dollars depending on prep and tile choice.
DIY can save on labor, but the real numbers surprise people. A saw rental or purchase, mixing tools, trowels, buckets, sponges, hole saws, levels, kneepads, clips, and cleanup supplies can add 300 dollars to 900 dollars fast. Then there's waste from bad cuts, broken tiles, and ordering the wrong amount. For most projects, I tell homeowners to order 10 percent extra tile for straight layouts and 12 to 15 percent for diagonal, plank, or highly patterned installations.
Where people get burned is hidden prep. Replacing rotted subfloor by a toilet, flattening an old kitchen, reinforcing joists, or rebuilding a leaking shower adds cost, but it's the kind of cost that prevents failure. I always prefer an honest estimate up front over the fake cheap number that turns into a change-order circus once demolition starts.
Choose a standard porcelain tile size and a straight lay pattern if you're watching the budget. It cuts labor, reduces waste, and still looks sharp.
Keep grout lines clean, recaulk movement joints when they crack, and fix plumbing drips quickly. Small maintenance now prevents expensive tear-outs later.
📍 How This Applies to Homes in Rockland & Orange County
Tile work in the Hudson Valley has its own personality, and a lot of that comes down to the houses themselves. In Nanuet, Spring Valley, Suffern, and parts of New City, I regularly work in older pre-1970s homes where the framing has settled, the floors aren't perfectly flat, and previous remodels left a layer cake of materials underneath. You can't treat those homes like new construction. Before tile goes down, you have to check deflection, inspect subfloors around toilets and tubs, and be realistic about what needs repair.
Then there's the climate. Harsh winters, freeze-thaw cycles, spring moisture, and summer humidity all affect how tile assemblies perform. Even interior tile feels those seasonal changes because wood framing expands and contracts, crawl spaces get damp, and entry areas take on snow, salt, and slush. That's one reason I like uncoupling membranes and proper movement gaps so much on floors around Nyack and Newburgh homes. They give the system a better shot at surviving the year without cracked grout or loose tile.
Bathrooms in older homes around Middletown and Newburgh often have hidden moisture issues from years of small leaks, weak bath fans, or outdated wall assemblies. Kitchens in busy family homes in places like Nanuet or Suffern usually need extra attention around appliance clearances, uneven transitions, and worn subfloors near sinks and dishwashers. Summer humidity can slow cure times, and spring moisture can reveal floor issues that seemed fine all winter, so timing and prep matter more than people realize.
That local reality is why cookie-cutter advice only gets you so far. Tile installation Rockland County NY homeowners need isn't just about picking a style off the shelf. It's about building a tile assembly that fits the actual house, the actual season, and the wear that comes with living in the Hudson Valley year-round.
Frequently Asked Questions
Ready to Get Started?
Get Your Free Estimate Today
Serving Rockland County & Orange County, NY. Professional results, guaranteed.
Request a Free Estimate →